
Blog
How to Choose Sieve Components in 2026?
Choosing Sieve Components in 2026 is less about buying a mesh by nominal size and more about matching every part to the material, method, and workload. A fine wire cloth can look right on a specification sheet, yet blind quickly when damp powder reaches the deck. Frame diameter, mesh material, aperture tolerance, sealing, and cleaning method all affect whether results stay repeatable. Small details matter.
Use recognized specifications as your starting point. ASTM E11 and ISO 3310-1 set requirements for test sieves, including aperture and construction checks. The USGS Mineral Commodity Summaries 2025 offers useful production context for mineral-processing applications, but it is not a sieve-selection guide. Treating market or production data as proof of component performance would be a mistake. Verify the actual test method and operating conditions.
For a measurement-focused perspective, quality expert W. Edwards Deming is often associated with the line, “In God we trust; all others must bring data.” It is a useful reminder, though Deming was not a sieve-industry specialist. Compare supplier certificates with inspection records, then trial the assembly using your own sample. Note whether material sticks, escapes at the frame, or wears the mesh unevenly. Not glamorous. Still important. This introduction uses standards and public-sector reporting as reference points; a current, verifiable quotation from a Sieve Components specialist should be added only when its source can be confirmed.
Define the Target Particle Range with ASTM E11 Apertures from 125 mm to 20 µm
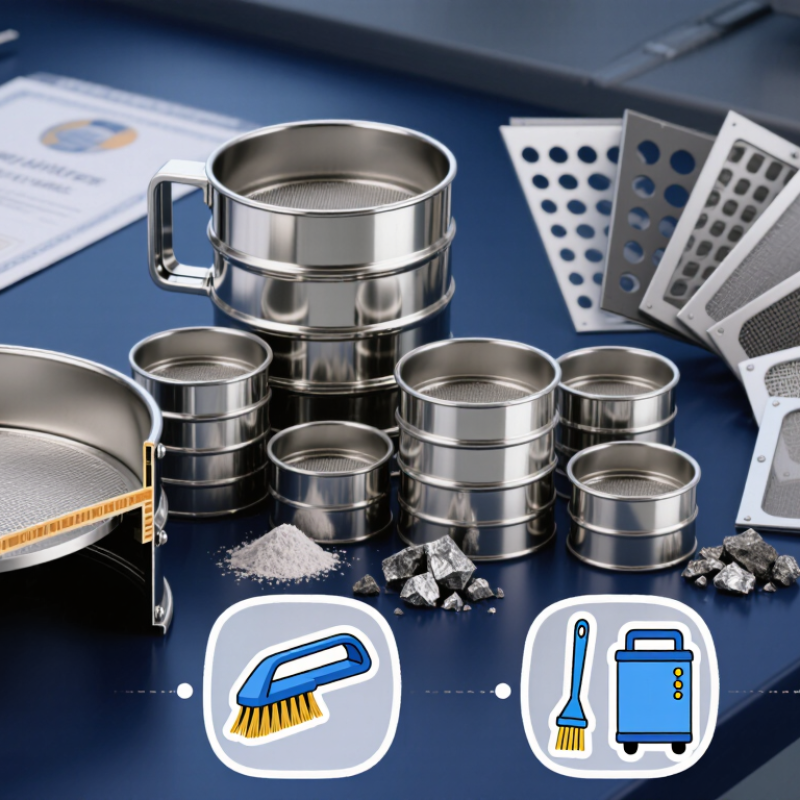
Choosing sieve components begins with the particles you need to separate, not the equipment catalogue. ASTM E11 apertures range from 125 mm down to 20 µm, covering coarse fragments through fine powders. Define the expected particle range and the cut points that matter to your process. A 10 mm opening may suit gravel, while a 75 µm opening may help assess a fine mineral fraction. These are examples, not universal settings.
For a sieve stack, arrange selected apertures from largest at the top to smallest at the bottom. Choose openings that give useful separation between fractions; too many closely spaced sieves can add handling time without improving the result. Particle shape matters, too. Flat flakes may pass differently from rounded grains of similar width. The nominal aperture is a reference, not a guarantee that every particle will behave alike.
Check that the sieve construction and documentation suit the method and material. Look for an identifiable aperture size, sound mesh, a secure frame, and current inspection or calibration records where required. Keep sieves clean, dry, and free of damaged wires. Small defects matter. A bent wire can change an opening, and residue can distort results. In practice, the chosen range may need adjustment after a trial run; that is not a failure, but a reason to review the sample and method.
Choose Mesh Material and Wire Cloth to Meet ISO 3310-1 Aperture Tolerances
How to Choose Sieve Components in 2026?
Choose mesh material and wire cloth by the aperture tolerance your test requires, not by appearance alone. ISO 3310-1:2016 covers nominal apertures from 20 μm to 125 mm and sets requirements for wire-cloth test sieves, including aperture tolerances and inspection. ASTM E11-22e1 also defines sieve-cloth opening requirements.
These standards make a key point: a sieve’s nominal mesh size is not proof that every opening meets specification. Small errors matter. A single oversized opening can affect results when particles sit near the cut point.
Stainless steel wire cloth is often selected for corrosion resistance and dimensional stability, especially when sieves are washed frequently. Check the wire diameter and weave as well as the aperture: thicker wire can reduce open area, while a damaged or distorted mesh may create irregular openings.
Ask for documented inspection against the applicable standard, and verify the aperture range that matters to your method. A clean-looking mesh can still be out of tolerance.
There is no perfect shortcut here; visual checks help spot damage, but they cannot replace measurement. Recheck after repairs or heavy use, because even careful handling can alter the cloth.
Match Sieve Frame Diameter and Height to the Shaker’s Rated Capacity
How to Choose Sieve Components in 2026?
Match Sieve Frame Diameter and Height to the Shaker’s Rated Capacity
Start with the shaker manual, not the sieve cabinet. Rated capacity may refer to sample load, total stack mass, or an approved stack configuration. These are not interchangeable. ASTM E11-22 and ISO 3310-1:2016 specify test-sieve requirements, but do not set one universal capacity for every shaker. Check the equipment documentation for permitted frame diameters, stack height, and loading limits.
Diameter changes the working area. A 300 mm frame has 2.25 times the nominal area of a 200 mm frame, based on diameter alone. That does not mean every sample load should increase by the same ratio: material density, particle size, and vibration settings matter. Height matters too. A tall stack can exceed the shaker’s permitted configuration or become less stable, even when its total mass seems acceptable.
Small mismatch, big effect.
Match the frame diameter to the shaker’s clamps and rated configuration, then keep stack height within the manual’s limit. Weigh the sample and sieve stack if the rating includes total load. For example, coarse, heavy aggregate can challenge capacity sooner than a light powder in the same frames. Do not assume a familiar frame size guarantees compatibility. It is tempting to treat this as a minor detail; verify the limit for the exact shaker model and setup.
Sources: ASTM E11-22; ISO 3310-1:2016.
Select Gaskets and Seals for Sample Chemistry, Temperature, and Dust Control
Choosing sieve gaskets starts with the sample, not the equipment catalog. Identify oils, solvents, salts, moisture, and cleaning agents that may contact the seal. Then compare them with the gasket material’s chemical-resistance data. Small details matter. Silicone, EPDM, fluorocarbon rubber, and PTFE behave differently; none is universally suitable. Check documented compatibility rather than relying on a material name alone.
Temperature affects both fit and service life. Consider normal screening conditions, cleaning cycles, and brief temperature excursions. A seal that works at room temperature may soften, harden, or lose compression when heated. It is tempting to choose the softest gasket, but that shortcut can mislead. Match thickness and hardness to the sieve design, and avoid overtightening, which can distort the seal or frame.
For dust control, inspect the full contact surface. A small gap near a clamp can let fine particles escape, even when the mesh is correctly seated. Keep gasket faces clean, dry, and free of dents; replace seals that show cracks or permanent flattening. One easy-to-miss detail is cleaning residue. It can affect sample purity and seal performance. Record the material, temperature range, and cleaning method used, then check the assembly under actual operating conditions.
Set Inspection and Calibration Checks Using ASTM E11 and ISO 3310-1 Criteria
How to Choose Sieve Components in 2026? Set inspection and calibration checks against ASTM E11 and ISO 3310-1. Both standards specify requirements for test sieves made with metal wire cloth. Their listed aperture sizes span 125 mm to 20 µm, so a small mesh defect can matter greatly at the fine end. Check the certificate and sieve marking against the size and standard required for your test. Look closely for bent wires, blocked openings, loose cloth, and dents around the frame. A clean sieve can still be wrong.
During calibration, compare measured openings with the applicable standard’s tolerances—not just the nominal size printed on the label. ASTM E11 provides aperture limits for test sieves; ISO 3310-1:2016 sets technical requirements and testing methods for woven-wire-cloth sieves. Use a documented inspection method, such as calibrated optical measurement, and record results, measurement uncertainty, and the sieve’s identification. Test multiple locations, especially if wear or damage appears uneven. A single reading is weak evidence.
Set inspection intervals using use, material abrasiveness, and past results. Record cleaning, inspection dates, and any out-of-tolerance findings. Replace or quarantine a sieve when its condition could affect results; do not assume repeated washing restores accuracy. This judgment can be imperfect. Review the interval when checks show drift, and verify that the chosen calibration procedure matches the current standard and your laboratory’s quality system.
| Component or Check | Selection / Example Data | Inspection or Calibration Check | Acceptance and Action |
|---|---|---|---|
| Selection and Compatibility | |||
| Test sieve cloth | Select the nominal aperture size required by the test method. Common nominal openings include 4.00 mm, 2.00 mm, 1.00 mm, 500 µm, 250 µm, 125 µm, and 63 µm. | Confirm the marked nominal opening and applicable specification on the sieve certificate or identification label. | Choose a sieve specified for the applicable method. These are nominal aperture examples, not tolerance limits. |
| Standard and specification | ASTM E11 and ISO 3310-1 address test sieves made with metal wire cloth. Their requirements and tolerance tables are not automatically interchangeable. | Check which standard and edition the test method or quality system requires; verify the sieve documentation against that specification. | Apply the tolerance and inspection requirements from the specified standard and edition. Do not combine limits from different standards. |
| Frame diameter and height | Choose a frame compatible with the shaker, stack, sample quantity, and other sieves in the set. Common laboratory frame diameters include 200 mm and 300 mm. | Check frame identification, roundness, joints, and fit with the stack, lid, and receiver. | Frame dimensions are selection examples, not a substitute for checking the applicable method and equipment compatibility. |
| Frame and cloth material | Select corrosion-resistant frame and cloth materials compatible with the sample, cleaning method, and operating environment. | Inspect for corrosion, chemical attack, dents, loose cloth, damaged soldered or bonded joints, and contamination. | Remove a sieve from service if damage or contamination could affect sample separation or recovery. |
| Lid and receiver | Use a lid and receiver that fit the selected frame series and help prevent sample loss during sieving. | Check seating surfaces, secure fit, cleanliness, and freedom from cracks, gaps, or retained material. | Replace or repair components that do not fit securely or could allow sample loss or cross-contamination. |
| Set Inspection and Calibration Checks | |||
| Visual examination | Inspect each sieve before use, especially fine-aperture sieves and sieves used with abrasive samples. | Use suitable lighting and magnification to look for blocked openings, distorted wires, broken wires, tears, and damaged edges. | Clean using a method that will not deform the cloth. Quarantine a sieve with damaged or persistently blocked openings. |
| Aperture measurement | Use an appropriate calibrated optical measuring system or other measurement procedure suitable for the aperture range. | Measure a representative distribution of openings across the usable cloth area, following the applicable standard’s inspection procedure. | Compare measurements with the permissible limits in the specified edition of ASTM E11 or ISO 3310-1. Do not use a generic tolerance in place of the standard’s tables. |
| Wire condition and weave | Check the cloth for consistent weave and intact wire intersections across the working area. | Examine for displaced, flattened, worn, or broken wires and for local regions that appear visibly different from the surrounding cloth. | Record defects and remove the sieve from service when the cloth no longer meets the applicable specification or method requirements. |
| Cleanliness and blockage | Check the cloth after cleaning and before each test; fine openings may retain particles that are not obvious at a glance. | Use a suitable non-damaging cleaning method and confirm that openings are clear without forcing tools through the cloth. | Do not use a sieve with unresolved blockage, residue, or damage that could change effective open area or contaminate a sample. |
| Fit, sealing, and sample recovery | Assemble sieves in the intended order with a compatible lid and receiver. | Check that components seat evenly and remain secure during the specified shaking procedure; inspect for leakage and retained sample. | Correct poor fit or replace damaged components before testing. Follow the test method for sieve order and operating conditions. |
| Calibration or verification interval | Set an interval based on use rate, sample abrasiveness, required measurement confidence, and the laboratory quality system. | Recheck after suspected damage, abnormal results, repair, or a significant change in use; retain inspection and measurement records. | ASTM E11 and ISO 3310-1 requirements should be applied as written; determine routine intervals through the applicable method and documented quality procedures. |
| Records and identification | Record a unique sieve ID, nominal aperture, applicable standard, inspection date, results, and status. | Maintain traceable measurement equipment records and link aperture inspection results to the individual sieve. | Label each sieve clearly as in service, restricted, or out of service according to the laboratory’s control procedure. |
Note: This table is a selection and inspection aid, not a replacement for the current editions of ASTM E11, ISO 3310-1, or the governing test method. Use the specified standard’s own procedures and permissible limits for formal conformity decisions.